


New molds in progress!
I've spent most of September making new molds, which will help me be more productive this fall, as well as introduce a few new exciting products. The mold-making process requires me to clean up all clay work, as clay and plaster can be a disastrous accidental combo in the kiln. Molds are perhaps my favorite part of my process, even though it is totally hidden from the final products. I love the three dimensional critical thinking needed to understand how to design a mold around the undercuts and textures of a shape.
Plaster is also a neat material - mixed with water, it starts an exothermic chemical reaction that gradually transforms a watery liquid though consistencies of cream, pudding, toothpaste, soap and then soft rock, over a period of about 2 hours, with most of the change happening in the first 15 minutes. I've learned to utilize these different stages for different situations. For example, if a model food is not solid, like broccoli or napa cabbage, I wait until the plaster has set up to pudding consistency, so that it will coat the surface, but won't flow straight through the broccoli crown. There's a lot to learn about ratios and techniques! Side note: the ceramics community just learned that one of the main slipcasting plaster manufacturers is discontinuing production THIS YEAR, so we're all scrambling to get the replacements lined up. It makes me appreciate just how precious this material is!

I spent some time making new molds for existing products, because the molds wear out after many uses, which makes a lot more work to do on the ceramics side of the process. So now I have new and improved napa cabbage and fennel molds! I also introduced the pipe bowls to the mold, so that they come out of the mold already shaped as a pipe, and I don't have to manually add it to every piece. I accomplished this by actually carving a bowl shape into the real food object! This will save a lot of time, and make for a more sturdy product. I did this with bananas, corn, apples, and the biggest okra I've ever seen in my life.

I also got to make molds of some new, very exciting objects. First was a couple luscious heirloom tomatoes, in Ohio. I was visiting my hometown in
August, and felt so enthusiastic about Midwestern tomatoes that I had to make a mold :) They're so dramatic and bursting with summer. I have recently been experimenting with using a spray gun to apply glaze, and I think the color gradations on tomatoes is the perfect situation for this technique - I can't wait to test it out with new colors! They'll look great in frames, and I think I will make a few into pipes this fall.
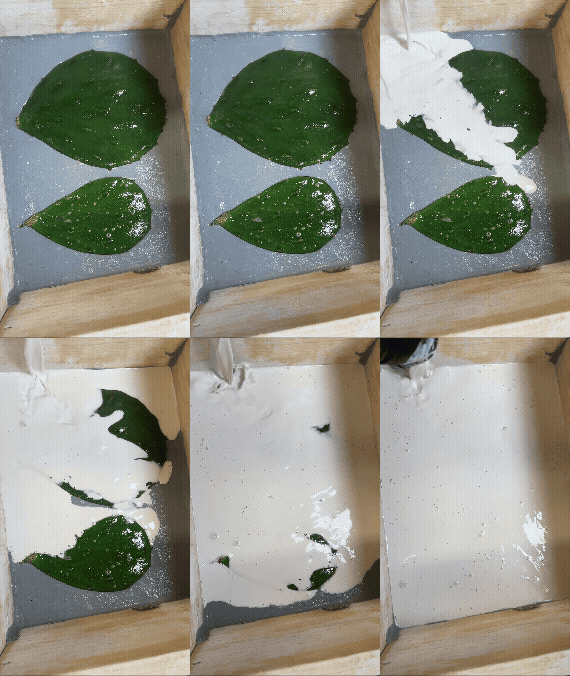
I also made a mold of two prickly pear pads/nopales. They're all over my neighborhood, and I admire them on my daily dog walks. I've been thinking "how cool would that texture be in clay..." and it is!! I think they'll be beautiful in frames, and also would make a great incense holder. I'm planning to add subtle little wire thorns, and I've got a good glaze in mind.
Speaking of glazes, I've been wanting to organize my glaze testing system, and part of this is to make a standardized test tile. I decided a cookie is a perfect size for a test tile, and also has lots of fun opportunities

for textures. So I found a really cute British shortbread cookie that was also quite delicious, and made a mold of two! Because shortbread is so [blessedly] buttery, I sprayed them with spray paint to create a impervious layer, so the butter couldn't soak into the plaster and ruin it (learned this the hard way with croissants).
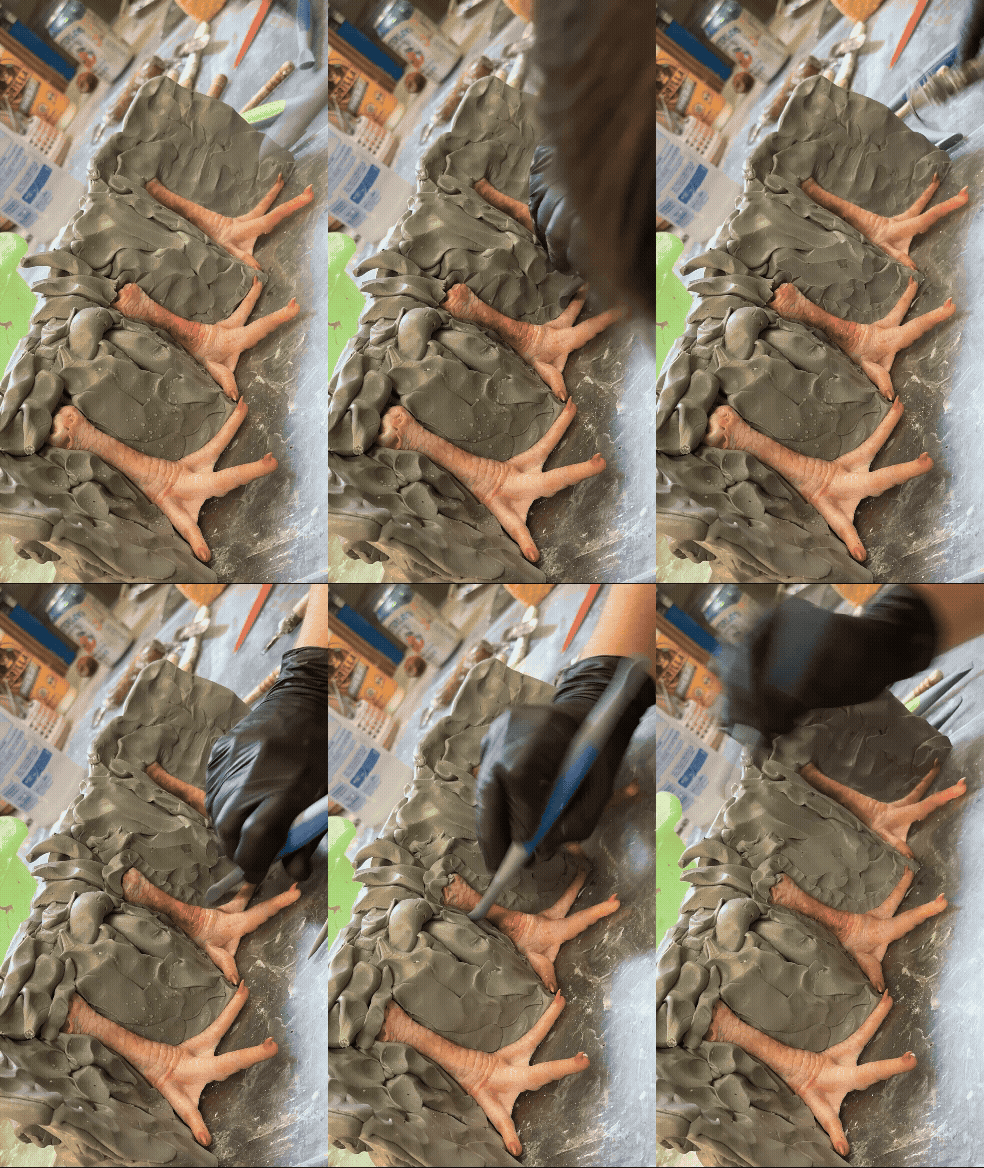
Finally, I have successfully made a new chicken foot mold. I tried this earlier this summer, and I unfortunately took three days to complete it, with revolting 🤢 and unsuccessful results. I tried again this month, and it was much more successful. Several problems arise with the chicken paws - they're soft and 🤢 squishy, which is difficult to sculpt the molding clay around accurately; they do not naturally sit upright, in the position that I want them to ultimately be molded, so I had to figure out how to hold them up without actually holding them (a wire inside helped 🤢); and then also they
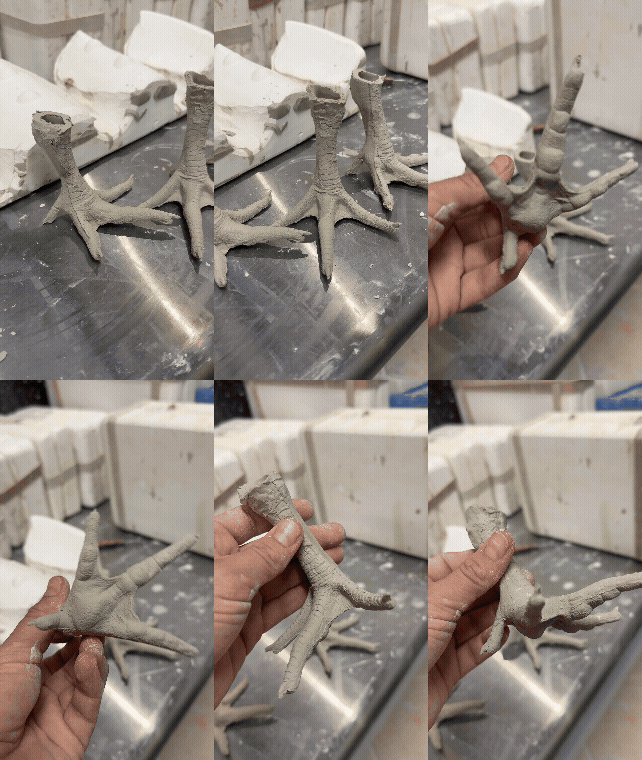
leaked fluids 🤢🤢🤢 that disrupted the plaster setting properly, so I sprayed the with shellac first, but that only partially helped. I'm just starting to cast these, and they look pretty damn good! But I'm not sure how durable the plaster is because of the above-mentioned leaking fluids... I might need to sacrifice this mold to make a rubber cast of these, while the details are still crisp, then make YET ANOTHER mold, but from non-stinky rubber feet.


Comments